Setup Guide
Last updated: September 24, 2026
This guide walks through installing AI Meeting Intelligence, connecting your calendar and CRM, using the review queue, and disconnecting or uninstalling the app.
1. Installing the app
Install AI Meeting Intelligence from the HubSpot Marketplace (or via a direct install link if you received one). You'll be taken to HubSpot's own authorization screen, where you choose which HubSpot account to connect and approve the permissions the app requests (contact and deal read/write access, and owner/schema read access — no delete permissions are ever requested).
Once authorized, log in or create your account and you'll land on your workspace's Review queue.
2. Connecting your CRM and calendar
Go to Settings to manage your connections:
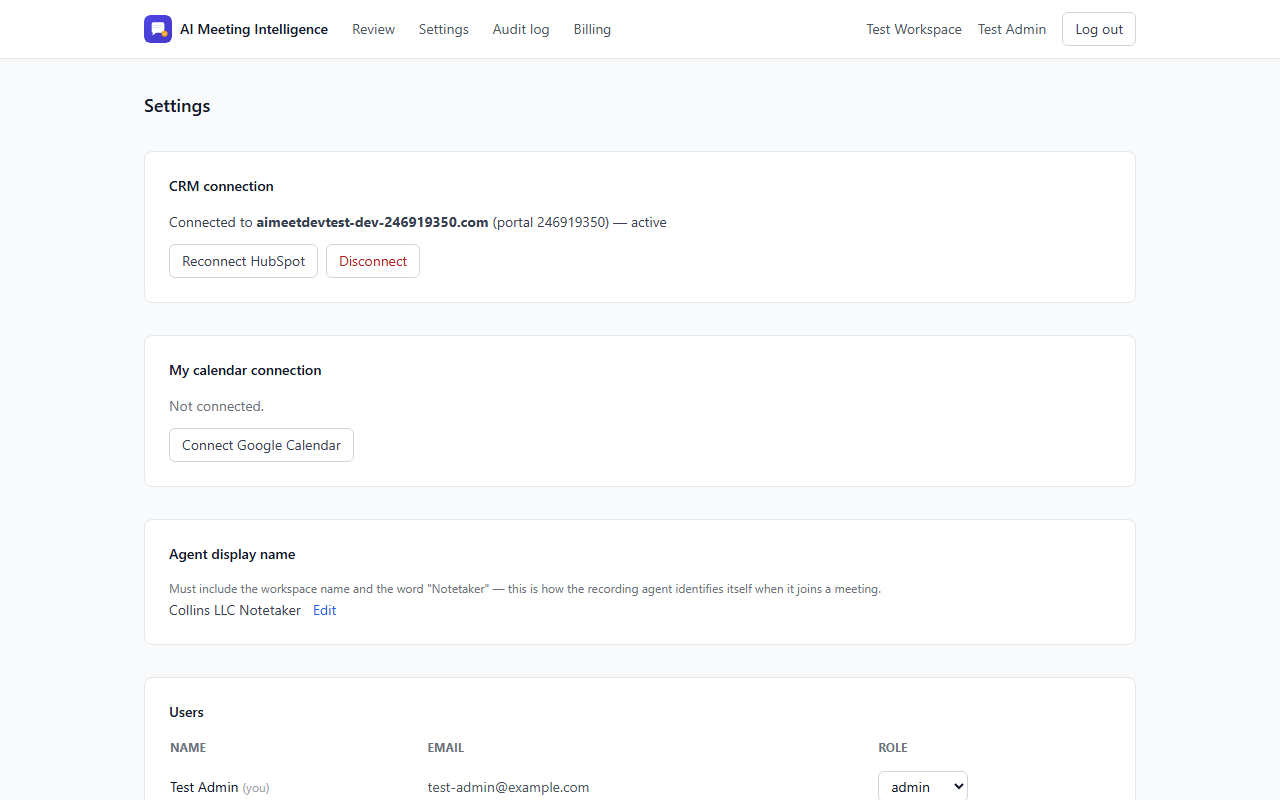
The Settings page — CRM connection, calendar connection, and agent display name.
- CRM connection shows your connected HubSpot account and its status. Use Reconnect HubSpot if a connection needs refreshing, or Disconnect to remove it (see section 6).
- My calendar connection is optional — connect Google Calendar so the app knows which meetings to join.
- Agent display name controls how the recording agent identifies itself when it joins a meeting — it must include your workspace name and the word "Notetaker," so participants can always tell who/what is in the call.
3. How meetings get captured
Once your calendar is connected, the agent joins your scheduled meetings automatically. At the start of every recorded meeting, it posts a spoken/chat announcement that the meeting is being recorded and transcribed, and states the keyword ("stop recording") any participant can use to object and immediately stop the recording.
4. Reviewing and approving CRM updates
After a meeting is transcribed and analyzed, it appears in your Review queue:
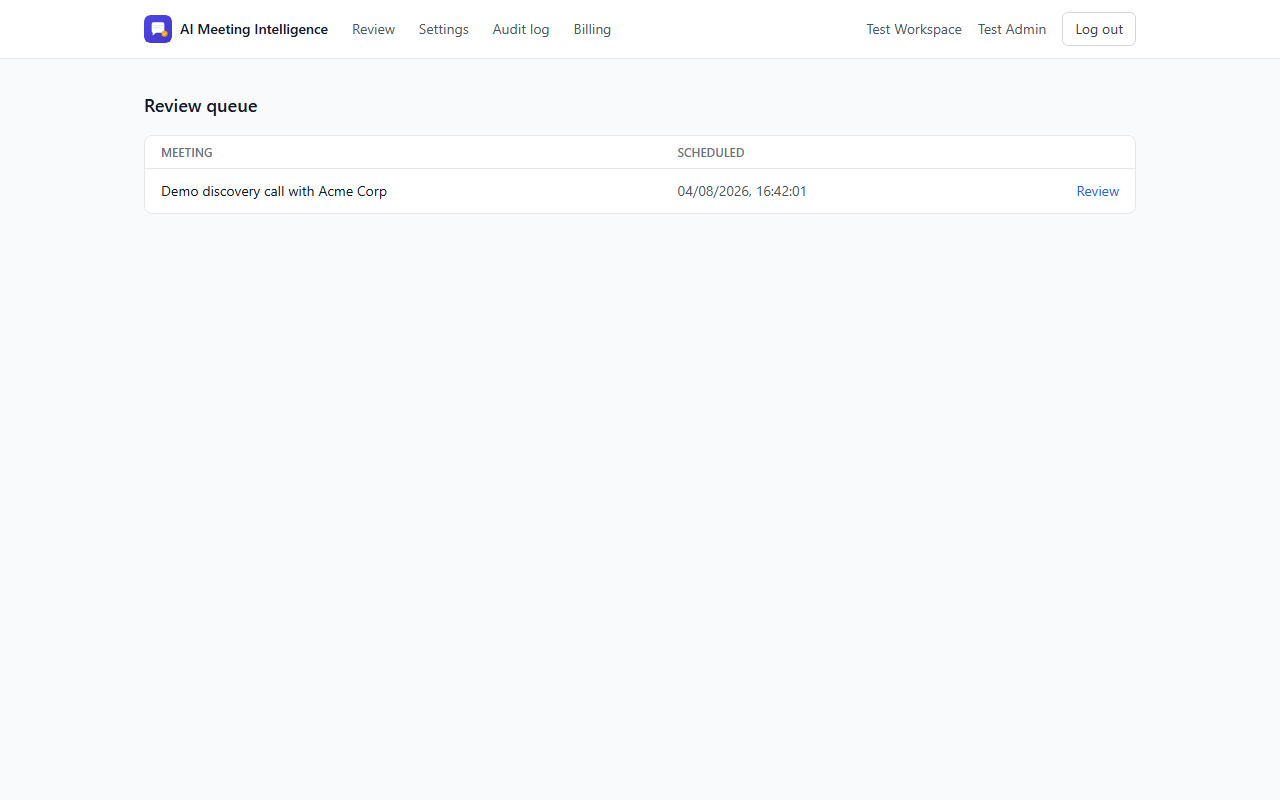
The Review queue — every meeting with proposed items waiting on a decision.
Open a meeting to see each proposed item — commitments, objections, deal updates — with a confidence score and the option to Accept, Reject, or Edit & accept it individually:
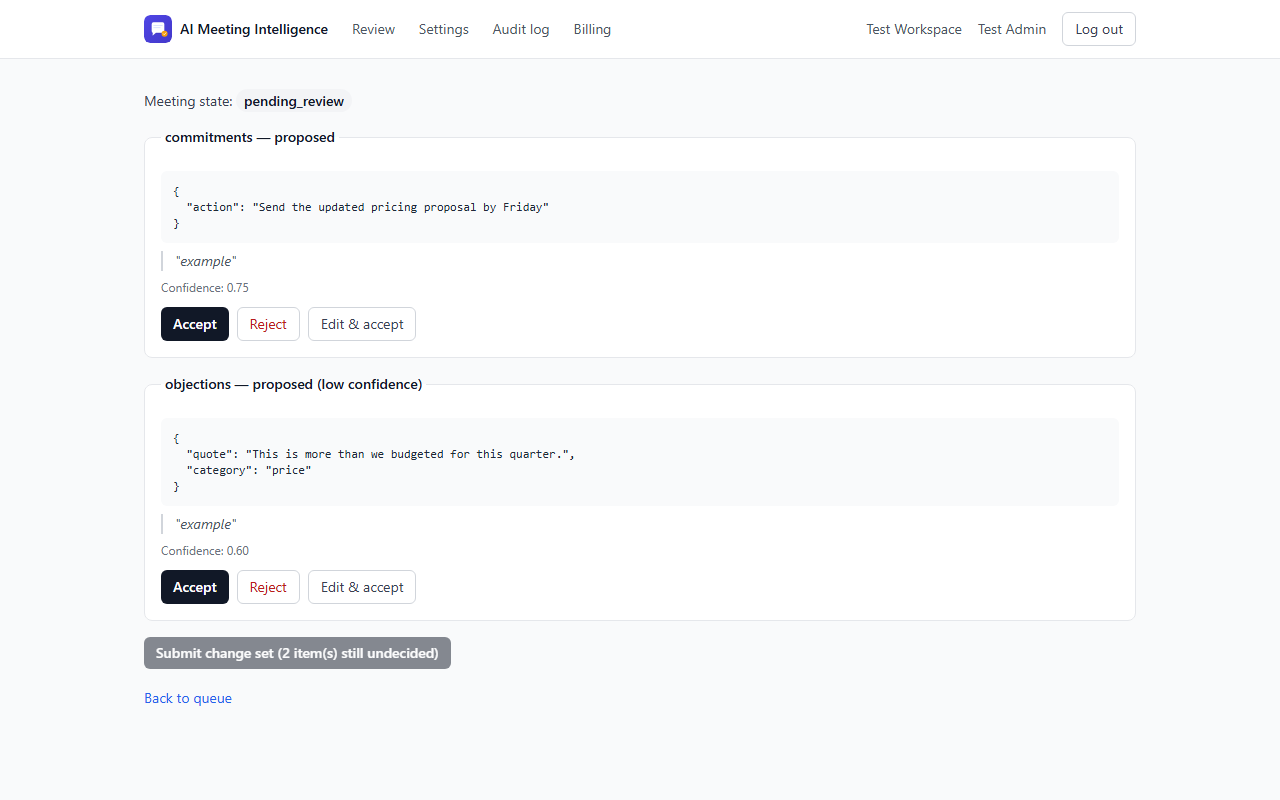
Reviewing a meeting — nothing is written to HubSpot until every item is decided and the change set is submitted.
Once every item has a decision, click Submit change set. Only the items you accepted are written to HubSpot; rejected items are discarded, and nothing is written automatically before you submit.
5. The card on your HubSpot deal records
Open any deal record in HubSpot and look for the "Meeting Intelligence" card. If it isn't showing by default, use the record's Customize option to add it from the card library (filter by "App" card type). The card lists meetings linked to that deal and links back into the review queue for anything still pending.
6. Tracking activity
The Audit log records every meaningful action taken on your workspace's data — CRM connections/disconnections, review decisions, and CRM writes — each with a timestamp, actor, and affected object, and can be exported as CSV:
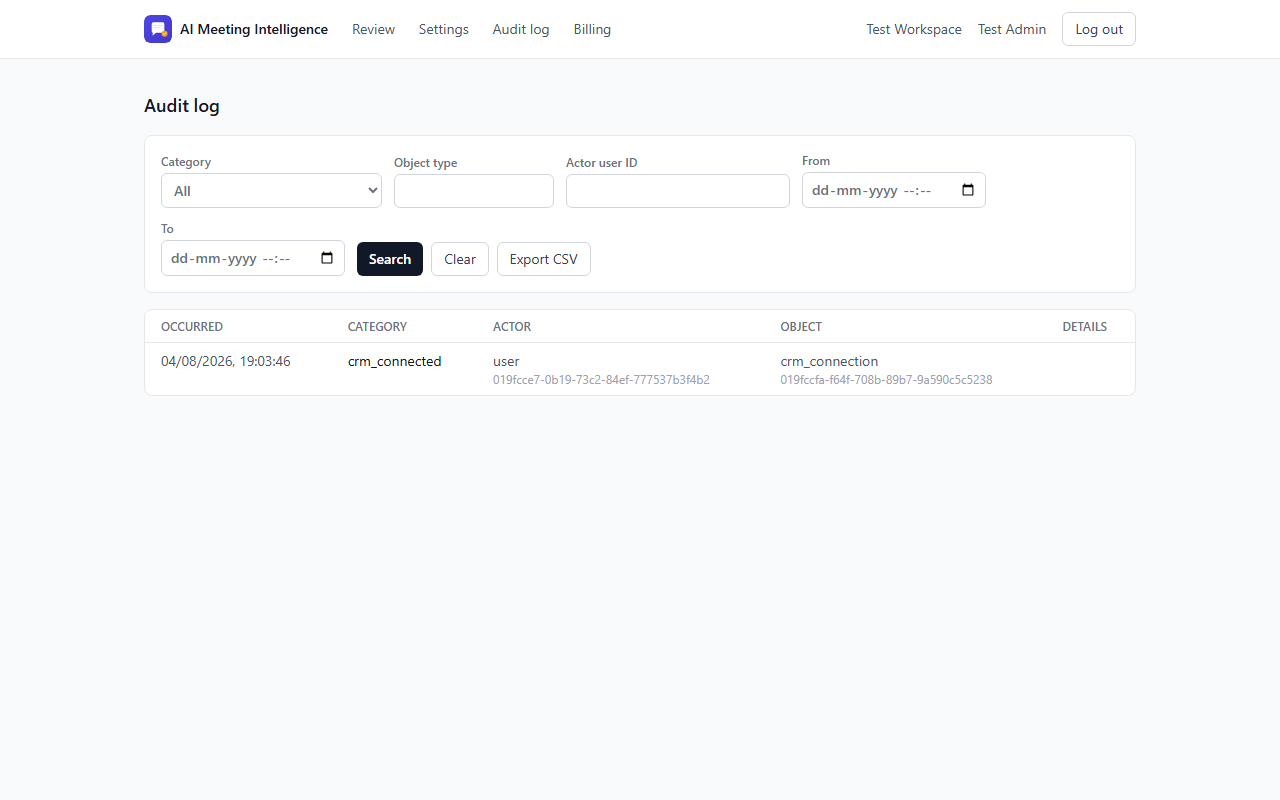
The Audit log — filterable by category, object type, actor, and date range.
7. Billing
New workspaces start on a trial — no payment method required. From Billing, an admin can see plan details, current usage against the monthly allowance, and add a payment method to convert to an active paid subscription:
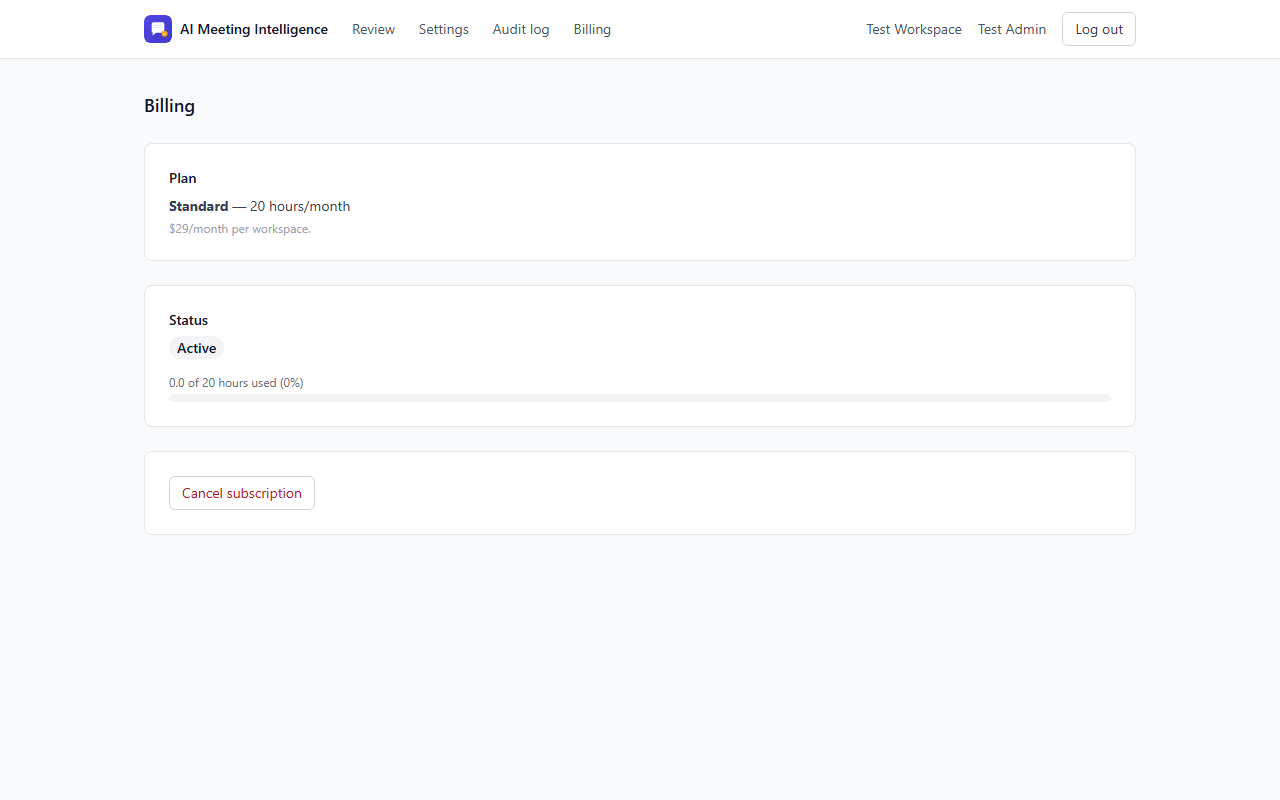
The Billing page — plan, usage, and subscription status.
8. Disconnecting and uninstalling
To disconnect HubSpot without uninstalling the app, go to Settings → CRM connection → Disconnect. This calls HubSpot's own Uninstall App endpoint for that connection (not just a token revoke), so the app's access is fully removed on HubSpot's side as well.
To remove the app entirely, uninstall it from HubSpot directly (Settings → Integrations → Connected Apps in your HubSpot account). You can cancel your subscription independently from Billing → Cancel subscription at any time.